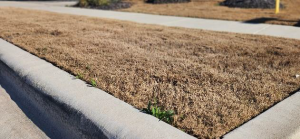
We’ve had a warmer than normal winter. The grass is still dormant, but the weeds aren’t. If you’ve started to notice pesky weeds or patches in your lawn, you’re not alone. Many homeowners face these same challenges, especially during seasonal transitions. While the appearance of weeds or thin/patchy areas in your lawn may seem like a random occurrence, they often stem from a combination of weather, timing, and lawn care practices, or sometimes the lack of them. One of the most critical pieces of lawn care is the effective use of pre-emergent. These products are essential for maintaining lush, healthy, weed-free turf. But why are they so important, and how do they relate to common lawn issues? What are Pre-Emergent Herbicides? Pre-Emergent herbicides are specialized products designed to stop weeds before they even appear. These products create a barrier in the soil that keeps weeds from germinating. This proactive approach is key in preventing weeds from taking over your turf before the season even starts. Why do you have weeds now? 1. Timing Issues The most common reason for weed invasion is improper timing when applying pre- emergent. Ideal application is before soil temperatures reach 55°F for several days, typically in the spring and fall seasons. 2. Heavy Rain or Irrigation Heavy rain or excessive irrigation can wash away pre-emergent. This is especially problematic if it occurs right after application. 3. Poor Lawn Health Thin patches create the perfect environment for weeds to take over. Weak grass struggles to compete for nutrients with aggressive weeds. Even proper pre- emergent application may be ineffective in an unhealthy lawn. Weeds will often still find an opportunity to establish themselves. Why do you have thin patches in your turf? 1. Compacted Soil When soil becomes compacted, grass cannot grow. Compaction is common in high foot traffic areas and heavy clay soils. Compacted soils limit oxygen and nutrients, leaving turf weak and vulnerable. 2. Improper Watering Watering too much and too little can both lead to a patchy lawn. Overwatering promotes fungal diseases and root rot. Underwatering can lead to turf drying out and dying. 3. Nutrient Deficiency Lack of proper fertilization can result in weak grass and thin patches. Your lawn needs a balanced diet of Nitrogen, Phosphorus, and Potassium specific for the Central Texas region. 4. Pest & Disease Grubs and Chinch bugs can damage your lawn by eating the grass roots and leaves. If you've noticed yellowing, browning, or thin patches in your lawn, pests could be the cause. Fungal diseases can also lead to bare or thinning patches in your lawn. Tips for healthy turf Apply pre-emergent at the right time: Timing is everything. Apply in early spring and again in the fall minimally. Address thin patches: Aerate your turf, reseed, and fertilize to improve grass density Proper watering: Ensure consistent watering with the correct coverage; early morning watering is best to avoid disease. Keep turf healthy: Mow regularly, fertilize, add soil enhancers as needed Monitor for pest & disease: Inspect your lawn regularly for signs of pest and disease presence. If you need help or assistance give us a call. We are here to help. Also check out our Seasonal Offers and start saving!
4 Key Components to Check Before Turning On Your Irrigation System in Central Texas
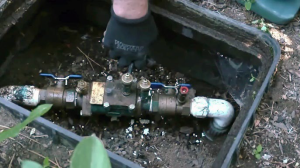
If you live in Central Texas, you know winter can be unpredictable. One week it’s 75° and sunny, the next we’re covering pipes for a surprise freeze. Before you flip the switch on your irrigation system this spring, it’s critical to make sure everything is in good shape. As irrigation professional in the Central Texas area, We see the same issues every year. A little preventative inspection now can save you from high water bills, soggy lawns, and expensive repairs later. Here are the four key components you should always check before running your system for the first time after winter. Backflow Preventer (Pressure Vacuum Breaker, RPZ or Double Check) Your backflow preventer is one of the most important safety components in your irrigation system. In Central Texas, most systems use a Double Check Back Flow, Pressure Vacuum Breaker (PVB) or a Reduced Pressure Zone (RPZ) assembly. Why It Matters This device prevents contaminated irrigation water from flowing back into your home or city’s drinking water supply. It’s required by code—and for good reason. What to Check Visible cracks in the brass body (especially after a hard freeze) Loose fittings or unions Leaking shut-off valves Missing or damaged test cocks or caps Freeze damage is extremely common here, particularly if the system wasn’t fully winterized. Even a small hairline crack can become a major leak under pressure. Pro Tip: When turning water back on, open the valves slowly. Sudden pressure can damage internal components. Valve Boxes and Solenoid Valves Valve boxes tend to collect dirt, mulch, and sometimes even fire ants over the winter. Why It Matters Your irrigation valves control water flow to each zone. If a valve sticks open or fails to activate, you’ll either have dry spots—or a swamp. What to Check Remove the lid and clear out debris Look for standing water (a sign of a leak) Inspect wires for rodent damage Check that each solenoid is secure and not cracked In Central Texas clay soils and shifting ground can also stress fittings and manifolds. If you see muddy water or soil erosion inside the box, that’s usually a red flag. Sprinkler Heads and Drip Lines Sprinkler heads take the most abuse year-round—from lawn mowers, foot traffic, pets, and soil movement. Why It Matters Even one broken or misaligned head can waste hundreds of gallons of water and create uneven coverage. With Central Texas often under watering restrictions, efficiency is critical. What to Check Broken or cracked heads Heads tilted or sunk too low Clogged nozzles Mismatched spray patterns Damaged drip emitters or chewed tubing Run each zone manually and walk the property while it’s operating. Look for: Dry patches Overspray onto sidewalks or driveways Excessive misting (often a sign of high pressure) Pro Tip: Spring is also a great time to adjust spray patterns to account for new landscaping or plant growth. Controller Settings (Don’t Skip This) While not a mechanical component, your irrigation controller deserves attention too. Check the date and time Replace backup batteries if needed Adjust watering schedules for spring rainfall Make sure you’re complying with local watering restrictions In Central Texas, overwatering in early spring is one of the biggest mistakes homeowners make. Clay soils hold moisture longer than you think. Final Thoughts Before turning your irrigation system loose for the season, take 30–60 minutes to inspect: Backflow preventer Valves and wiring Sprinkler heads and drip lines A careful spring startup helps: Prevent costly leaks Improve water efficiency Protect your home’s water supply Keep your landscape healthy through our intense Texas summer If you’re unsure about anything—or if you experienced a hard freeze this winter—it’s always smart to schedule a professional irrigation checkup. Give us a call 512-930-4707 A little attention now goes a long way toward a stress-free watering season. SPRING START-UP SPECIAL $49.99 incl. up to 12 zones. Click to Learn More.